Welcome to the inaugural post in our Strategy Experiments series, where we publish hypotheses, code, and performance analyses of live bot strategies.
We're thrilled to return to the Hummingbot blog with an exciting experiment: developing a crypto trading bot using the open-source Hummingbot platform. This bot employs an indicator-based directional strategy on the Binance Futures exchange, leveraging MACD and Bollinger Bands.
As the first entry in our Strategy Experiments series, we aim to foster a collaborative environment where users can share their strategic insights with the community, enhancing growth and knowledge exchange among quantitative traders.
We invite everyone to contribute their Strategy Experiments, regardless of outcome, as there is valuable learning in each experience. Through sharing insights and discussing novel concepts, we aspire to cultivate a vibrant ecosystem for continual improvement and refinement of trading strategies.
Below is a detailed account of our first experiment. You can watch the accompanying video or read the following description.
Welcome to the new Hummingbot Quickstart Guide! This will teach you how to build and customize market making strategy using Hummingbot over 5 exercises.
Whether you're a beginner or an experienced trader, this guide should help you get started with creating your own custom trading strategies using Hummingbot. So, let's dive in and start building!
Note
Introduced in version 1.4.0, Scripts enable users to build customized strategies and access the full power of Hummingbot exchange connectors without creating a full-blown strategy. Scripts are light Python files that can be run and modified without re-compilation, which let users can stop a script, adjust the code, and start it without leaving the Hummingbot client interface. See Examples for a list of the current sample scripts in the Hummingbot codebase.
First, check out the Installation section to install Hummingbot. You may install it using Docker (easiest for new users) or from source (best for developers).
If you have questions or need help, join the official Hummingbot Discord and ask for help on the #support channel from our community.
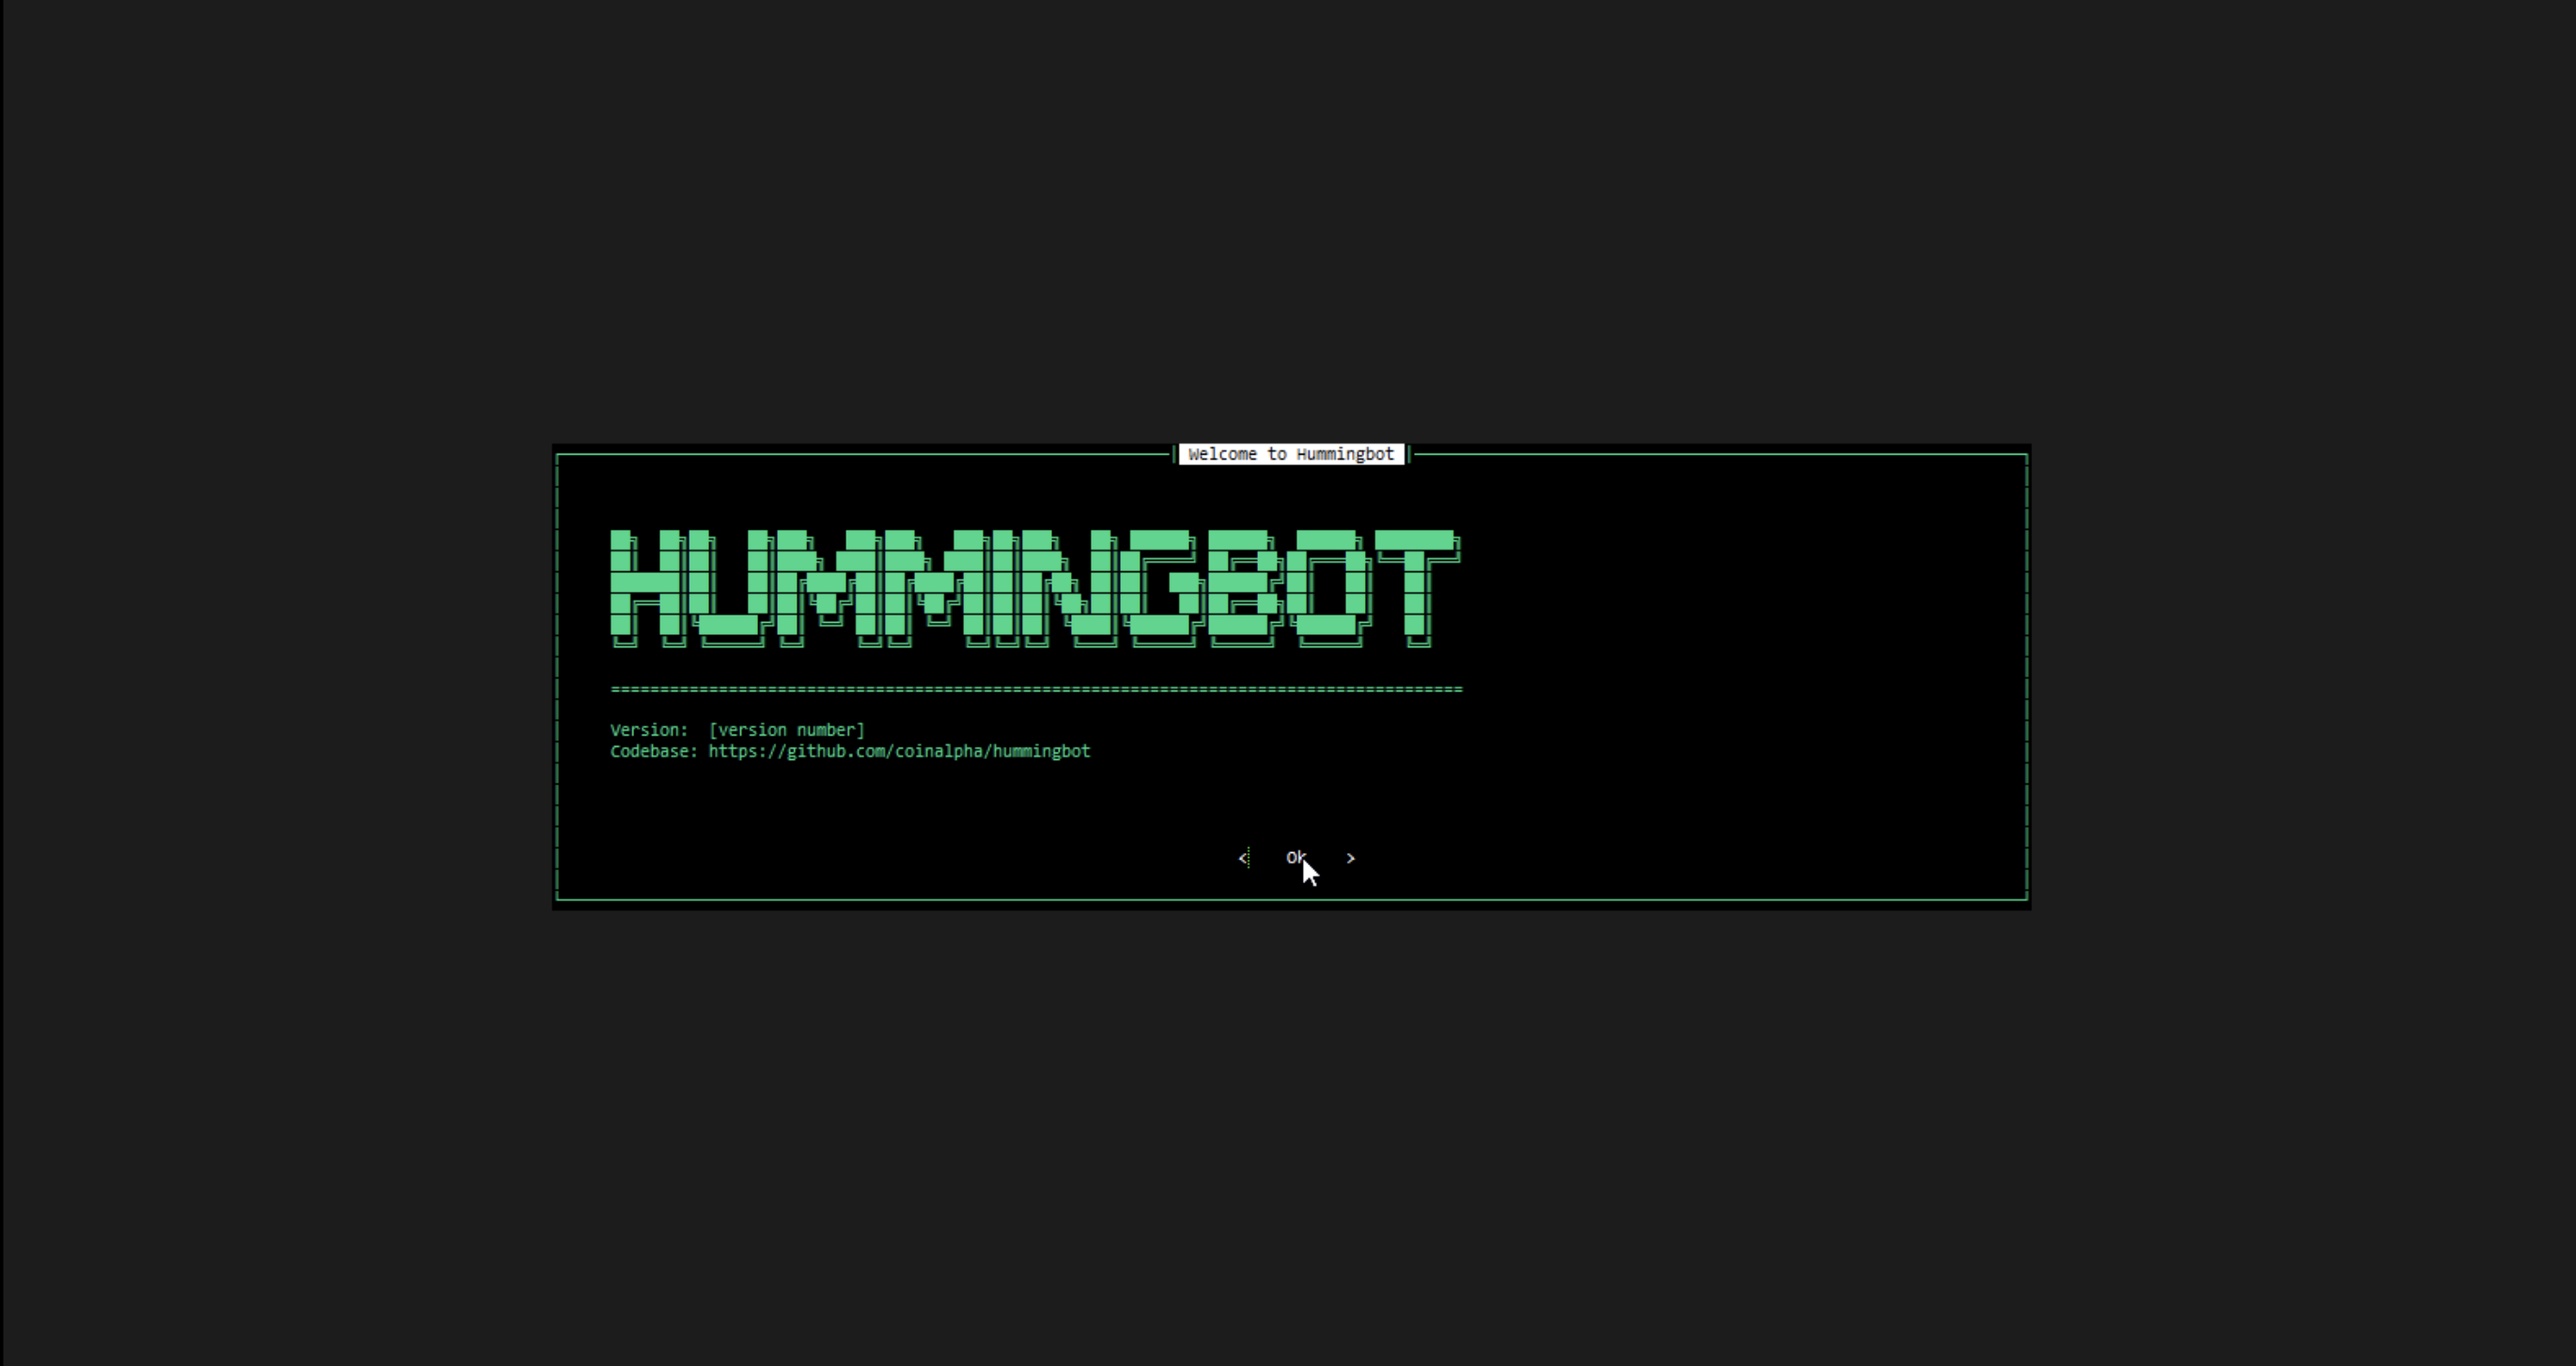
If you have installed Hummingbot successfully, you should see a welcome screen like the one below:
The Hummingbot CLI helps you manage, configure, and run your bots. Familiarize yourself with the basic features in Hummingbot, especially the User Interface.
We will start with a simple "Hello World" example of a Hummingbot script and gradually add more functionality to it with each exercise. By the end, you should gain a basic understanding of how to create a market making strategy and use market data to customize its behavior.
Open the codebase in your favorite IDE such as VSCode or PyCharm and follow the steps below:
Create a new file inside the scripts folder and name it quickstart_script.py
Add the following code to the quickstart_script.py file:
fromhummingbot.strategy.script_strategy_baseimportScriptStrategyBaseclassQuickstartScript(ScriptStrategyBase):# It is recommended to first use a paper trade exchange connector # while coding your strategy, and then switch to a real one once you're happy with it.markets={"binance_paper_trade":{"BTC-USDT"}}# Next, let's code the logic that will be executed every tick_size (default=1sec)defon_tick(self):price=self.connectors["binance_paper_trade"].get_mid_price("BTC-USDT")msg=f"Bitcoin price: ${price}"self.logger().info(msg)self.notify_hb_app_with_timestamp(msg)
The on_tick method runs for every tick that the bot internal clock executes. By default, the tick_size is 1 second, and you can adjust this parameter in the global conf_client.yml config file.
All the connectors that you defined on markets are initialized when the script starts. You can access them in the class by calling self.connectors, which is a dictionary with the following structure: Dict[CONNECTOR_NAME, ConnectorBase].
To get the mid-price of Bitcoin, we are using the connector binance_paper_trade by calling the get_mid_price method, i.e. self.connectors["binance_paper_trade"].get_mid_price("BTC-USDT")
The logic to get the mid-price for any connector is: self.connectors[CONNECTOR_NAME].get_mid_price(TRADING_PAIR). Make sure that you define the connector and trading pair in markets before using them.
self.logger().info(msg) prints the message in msg to your Hummingbot log panel (right hand pane) and saves it to the log file, which is in logs/log_quickstart_script.log .
self.notify_hb_app_with_timestamp(msg) sends the message to the Hummingbot output panel (top left pane). If you have set up Telegram bot integration, you will get the message on your Telegram chat as well.
If you installed Hummingbot from source, you should open Terminal/Bash and run the client with ./start (make sure to run conda activate hummingbot first).
You will see a sqlite database (/data/quickstart_script.sqlite) and a log file (/logs/log_quickstart_script.log) created for your script
Your script is loaded up at runtime, so you don’t have to exit Hummingbot while you are updating your script code. You will just need to stop (to stop the current execution) and start it again with the command start --script script.py again.
Tip
💡 If you have already run the script and the file name is in the top status bar, then you can run it again with just the start command instead of adding the script name.
If you want to use a real connector instead of a paper trade one, first you need to configure it using the connect command and provide all the required API credentials. See https://docs.hummingbot.org/client/connect/ for more details.
Use the ↑ key in the client to cycle through the list of previous commands
Use DBeaver or another free database management tool to open the sqlite database to see what the data that Hummingbot stores for you.
Add a new file inside the scripts folder: quickstart_script_2.py
Open the file in your IDE editor and add this code to it:
importloggingfromdecimalimportDecimalfromtypingimportListfromhummingbot.core.data_type.commonimportOrderType,PriceType,TradeTypefromhummingbot.core.data_type.order_candidateimportOrderCandidatefromhummingbot.core.event.eventsimportOrderFilledEventfromhummingbot.strategy.script_strategy_baseimportScriptStrategyBaseclassQuickstartScript2(ScriptStrategyBase):bid_spread=0.008ask_spread=0.008order_refresh_time=15order_amount=0.01create_timestamp=0trading_pair="ETH-USDT"exchange="binance_paper_trade"# Here you can use for example the LastTrade price to use in your strategyprice_source=PriceType.MidPricemarkets={exchange:{trading_pair}}
We define the variables that the script will use:
bid_spread and ask_spread calculate the price of our orders by applying a spread to the market price
order_refresh_time and create_timestamp define when to cancel open orders and place new ones
order_amount is the amount in units of the base asset (ETH in this example) for our orders
price_source define how the market price is retrieved using the get_price_by_type method. The options for PriceType are:
MidPrice
BestBid
BestAsk
LastTrade
LastOwnTrade
Custom (if you are using a custom API to get the price)
trading_pair and exchange will be used to initialize the markets, as we saw in the previous example.
The method get_active_orders gives you a list of the active limit orders.
We are going to cancel each order by calling the method self.cancel(connector_name, trading_pair, client_order_id)
We are using the information of trading_pair of the LimitOrder and the client_order_id which is an internal order id that Hummingbot generates before sending the order.
First, we are getting the reference price (in this case MidPrice) which we are going to use to calculate the bid and ask prices, by multiplying it with the bid and ask spread.
Then we are creating two OrderCandidate's and return them inside a list.
Here, we are looping over the list of order candidates, and then we are executing the method place_order which is the one that we are going to explain next.
Based on the side of the order we are going to call the method buy or sell of the strategy.
It is important to execute the buy and sell methods of the strategy because the logic of the order tracking is encapsulated there. If you buy or sell directly with the connector, you are going to loose the tracking of the order by the strategy.
defdid_fill_order(self,event:OrderFilledEvent):msg=(f"{event.trade_type.name}{round(event.amount,2)}{event.trading_pair}{self.exchange} at {round(event.price,2)}")self.log_with_clock(logging.INFO,msg)self.notify_hb_app_with_timestamp(msg)
Finally, let’s define a handler for a Hummingbot event. You can use them to create custom logic to handle event if the event happens!
Hummingbot has the following events implemented:
did_fill_order
did_complete_buy_order
did_complete_sell_order
did_cancel_order
did_create_buy_order
did_create_sell_order
did_fail_order
In this case, we are just logging the message and sending the notification to the app.
Optional Exercise:
💡 Try to implement handlers for these other events and print log messages when they occur!
As before, open a terminal and run the client with ./start (Make sure that the conda environment is activated)
Start the script with the command: start --script quickstart_script_2.py.
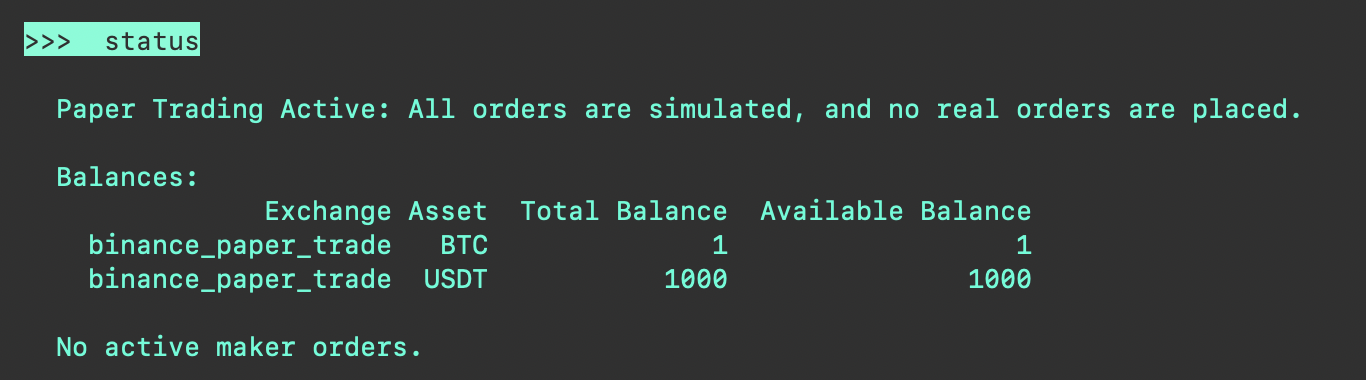
Run the command: status --live and you should see:
Run the history command to see all the trades that you have performed and the current profit/loss. This performance is measured by comparing the value of your current assets with the value if no trades had happened. See this blog post for details.
defformat_status(self)->str:""" Returns status of the current strategy on user balances and current active orders. This function is called when status command is issued. Override this function to create custom status display output. """ifnotself.ready_to_trade:return"Market connectors are not ready."lines=[]warning_lines=[]warning_lines.extend(self.network_warning(self.get_market_trading_pair_tuples()))balance_df=self.get_balance_df()lines.extend([""," Balances:"]+[" "+lineforlineinbalance_df.to_string(index=False).split("\n")])try:df=self.active_orders_df()lines.extend([""," Orders:"]+[" "+lineforlineindf.to_string(index=False).split("\n")])exceptValueError:lines.extend([""," No active maker orders."])warning_lines.extend(self.balance_warning(self.get_market_trading_pair_tuples()))iflen(warning_lines)>0:lines.extend(["","*** WARNINGS ***"]+warning_lines)return"\n".join(lines)
Note that the method returns a string; this string will be displayed when the users runs the status command.
If the markets are not ready to trade, the string will be “Market connectors are not ready”
There are two lists that we building:
lines: this list appends all the information that we want to show by using the method extend on the list
warning_lines: this list appends the network and balance warnings
We can transform a DataFrame to text using the to_string method
Lastly, to return the final string, the join method join all the strings that we have in the two lists, adding \n to inject a new line as a separator.
Note that when you ran the status --live command in the previous example, the output that you were seeing was the result of this (un-customized) method.
Now, let’s code our custom format_status method. Add the following code inside the QuickstartScript2 class:
defformat_status(self)->str:ifnotself.ready_to_trade:return"Market connectors are not ready."mid_price=self.connectors[self.exchange].get_price_by_type(self.trading_pair,PriceType.MidPrice)best_ask=self.connectors[self.exchange].get_price_by_type(self.trading_pair,PriceType.BestAsk)best_bid=self.connectors[self.exchange].get_price_by_type(self.trading_pair,PriceType.BestBid)last_trade_price=self.connectors[self.exchange].get_price_by_type(self.trading_pair,PriceType.LastTrade)custom_format_status=f"""| Mid price: {mid_price:.2f}| Last trade price: {last_trade_price:.2f}| Best ask: {best_ask:.2f} | Best bid: {best_bid:.2f} | """returncustom_format_status
We are using the conditional to see if all markets are ready like the previous example
We are getting the mid price, best ask, best bid and last trade price by using the connector
Creating a multiline f-string to show all the variables that we want!
In this case, we are overriding the original format_status but you may also extend it by appending to the lines list with another list that contains custom strings.
Markets with low liquidity are easy to manipulate, as this real-life example shows. In less than 8 hours, the price in this trading pair has pumped 39% and then returned to the original price.
If you were a naive market maker providing liquidity all the way through this pattern, you would likely have lost money since:
During the price uptrend, only your sell orders are executed
After the price peaks and the downtrend starts, only your buy orders are executed
Effectively, you sell your base asset at a lower price and buy it back at a higher price
One method to mitigate this risk is to define a price window that you will provide liquidity:
Below a floor price, the bot won’t place sell orders
Above a ceiling price, the bot won’t place buy orders
So how do we define these limits?
We can fix the floor and ceiling thresholds based on recent minimum and maximum price values.
Let’s select the following thresholds for this example:
price_ceiling: 0.0327
price_floor: 0.02736
As shown above, the bot is protected when the price goes above 0.0327 because is not going to buy more tokens. Also, if the price goes below 0.02736 the bot is not going to sell the tokens.
In the next example, we’ll use a statistical approach to create dynamic price ceiling/floor parameters that adjust based on market conditions.
We will extend the file used in the last example: quickstart_script_2.py
Let’s quickly recap the structure of the on_tick method:
defon_tick(self):ifself.create_timestamp<=self.current_timestamp:self.cancel_all_orders()proposal:List[OrderCandidate]=self.create_proposal()# HERE WE CAN CHECK IF THE ORDERS ARE INSIDE THE BOUNDSproposal_adjusted:List[OrderCandidate]=self.adjust_proposal_to_budget(proposal)self.place_orders(proposal_adjusted)self.create_timestamp=self.order_refresh_time+self.current_timestamp
The comment location is where we can check if the price of the sell order is above the ceiling_price or if the price of the buy order is below the floor_price.
First, let’s add these new variables to the class:
importloggingfromdecimalimportDecimalfromtypingimportListfromhummingbot.core.data_type.commonimportOrderType,PriceType,TradeTypefromhummingbot.core.data_type.order_candidateimportOrderCandidatefromhummingbot.core.event.eventsimportOrderFilledEventfromhummingbot.strategy.script_strategy_baseimportScriptStrategyBaseclassQuickstartScript2(ScriptStrategyBase):bid_spread=0.008ask_spread=0.008order_refresh_time=15order_amount=0.01create_timestamp=0trading_pair="ETH-USDT"exchange="binance_paper_trade"# Here you can use for example the LastTrade price to use in your strategyprice_source=PriceType.MidPriceprice_ceiling=1700price_floor=1600markets={exchange:{trading_pair}}
Tip
Select these values based on the current market prices, as this tutorial was last updated in Feb 2023.
Start and stop the script as you did before, but change the values of price ceiling/floor and using status to check the current price ceiling/floor and whether your bot is placing orders correctly.
Finally, let’s learn how to customize our script by utilizing order book data, leveraging Hummingbot’s ability to synchronously stream real-time Level 2 order book data from multiple exchanges simultaneously.
We will improve the last exercise by adding a dynamic calculation of the price ceiling/floor feature based on the Bollinger Bands.
To do so, we will:
Use the CandlesFactory object that will create an instance of the candles of the trading pair and interval that we want. Is important to notice that we can create as many candles as we want and they are not related to the markets that you define on the class variable markets. This is handy for example if you want to trade on KuCoin with the information of Binance.
Once we get the class of the candles, we need to start them. The start will initialize the WebSocket connection to receive the most updated information on the current candle, and also request the historical candles needed to complete the records requested. We are going to do this on the __init__.
Also we need to add a method to stop the candle when the script is stopped. We can override the method on_stop which let’s us code a custom shutdown when the bot is stopped via the stop command.
To calculate the bounds we are going to create a method that will add the Bollinger Bands using as a value 100 periods and 2 std. Then the upper bound will be price_ceiling and the lower bound will be price_floor.
Now, let’s implement the solution, extending the same file as the last example: quickstart_script_2.py.
importloggingfromdecimalimportDecimalfromtypingimportList,Dictimportpandasaspdimportpandas_taasta# noqa: F401fromhummingbot.core.data_type.commonimportOrderType,PriceType,TradeTypefromhummingbot.core.data_type.order_candidateimportOrderCandidatefromhummingbot.core.event.eventsimportOrderFilledEventfromhummingbot.data_feed.candles_feed.candles_factoryimportCandlesFactory,CandlesConfigfromhummingbot.strategy.script_strategy_baseimportScriptStrategyBaseclassQuickstartScript2(ScriptStrategyBase):bid_spread=0.008ask_spread=0.008order_refresh_time=15order_amount=0.01create_timestamp=0trading_pair="ETH-USDT"exchange="binance_paper_trade"# Here you can use for example the LastTrade price to use in your strategyprice_source=PriceType.MidPriceprice_ceiling=1700price_floor=1600candles_config=CandlesConfig(connector="binance",trading_pair="ETH-USDT",interval="1m",max_records=500)eth_1m_candles=CandlesFactory.get_candle(candles_config)markets={exchange:{trading_pair}}
We import the CandlesFactory & CandlesConfig class and call the get_candle method to create a candle instance in the variable eth_1m_candles.
Note that we are importing pandas_ta, a library that we will use to generate technical indicators from the candle data.
While we still define initial values for price_ceiling and price_floor, we will override them later in the on_tick method.
Add functions that override the __init__ and on_close methods:
def__init__(self,connectors:Dict[str,ConnectorBase]):# Is necessary to start the Candles Feed.super().__init__(connectors)self.eth_1m_candles.start()
The method above starts collecting data when the script starts.
defon_stop(self):""" Without this functionality, the network iterator will continue running forever after stopping the strategy That's why is necessary to introduce this new feature to make a custom stop with the strategy. :return: """self.eth_1m_candles.stop()
The method above stops collecting data when the user runs the stop command.
Add a method that uses the data in eth_1m_candles to calculate moving price ceiling/floor using Bollinger Bands and update the values of the price_ceiling and price_floor.
We are adding a new condition that will block the execution if the candles are not ready.
Then we are adding the method calculate_price_ceiling_floor and the implementation is accessing to the dataframe of the Candles object by using the method self.eth_1m_candles.candles_df
Lastly, we are getting the last row and assigning the upper and lower bound to price_ceiling and price_floor
Tip
Check out the pandas-ta documentation to learn how to generate other types of technical indicators.
Before we run the script, let’s improve the status command and show the candles data, as well as the current values for the price_ceiling and price_floor.
defformat_status(self)->str:ifnotself.ready_to_trade:return"Market connectors are not ready."lines=[]mid_price=self.connectors[self.exchange].get_price_by_type(self.trading_pair,PriceType.MidPrice)best_ask=self.connectors[self.exchange].get_price_by_type(self.trading_pair,PriceType.BestAsk)best_bid=self.connectors[self.exchange].get_price_by_type(self.trading_pair,PriceType.BestBid)last_trade_price=self.connectors[self.exchange].get_price_by_type(self.trading_pair,PriceType.LastTrade)custom_format_status=f"""| Mid price: {mid_price:.2f}| Last trade price: {last_trade_price:.2f}| Best ask: {best_ask:.2f} | Best bid: {best_bid:.2f}| Price ceiling {self.price_ceiling:.2f} | Price floor {self.price_floor:.2f}"""lines.extend([custom_format_status])ifself.eth_1m_candles.is_ready:lines.extend(["\n############################################ Market Data ############################################\n"])candles_df=self.eth_1m_candles.candles_df# Let's add some technical indicatorscandles_df.ta.bbands(length=100,std=2,append=True)candles_df["timestamp"]=pd.to_datetime(candles_df["timestamp"],unit="ms")lines.extend([f"Candles: {self.eth_1m_candles.name} | Interval: {self.eth_1m_candles.interval}\n"])lines.extend([" "+lineforlineincandles_df.tail().to_string(index=False).split("\n")])lines.extend(["\n-----------------------------------------------------------------------------------------------------------\n"])else:lines.extend([""," No data collected."])return"\n".join(lines)
We are using the list approach to add strings and then show all of them
First, we are adding to our original text the price ceiling and price floor
Then we are logging the information of the candles.
Check that when you run the code, the last candle is updated in real-time ;)
I hope you're having a good day! Today, let's dive into the topic of how to get good at market making!
So, a little bit of introduction first! I am Wojak, an active member of the Miner community, and I have been competitively market making on the platform for the past year.
As we all know, market making is not simple. It's even harder to compete on the Hummingbot Miner platform. Getting good at market making requires knowledge of market dynamics and technical skills to scale up the business. In addition, your funds could be in grave danger if you don't have a good strategy to counter adverse market conditions.
Therefore, it would be great if a beginner could start their market making journey with a bag full of tips and tricks! Say no more; I'm here to help!
The end goal of Liquidity Mining strategies is to outperform traditional staking and farming yields in DEFI/CEFI using your crypto assets.
If you HODL crypto assets in exchanges like Binance, Kucoin, Gate.io, or Ascendex and are not using them for trading, staking, or yield farming on these platforms, you are missing out on potential passive income from these assets.
This is where Liquidity Mining comes into play:
Advantages:
Higher ROI
No lockup period for your assets
Disadvantages (or so):
Requirement of a trading bot
For this, Hummingbot has already created a ready-to-use trading bot for the special purposes of liquidity mining, pure market making, arbitrage, etc.
I am delighted to share insights that have enabled us to expand our fund while providing a steady monthly income for our families. I extend heartfelt thanks to the Hummingbot Foundation & CoinAlpha for their support.
Though only a few in the Discord community know me, a brief personal introduction seems appropriate. My reticence in joining discussions stems from my shyness and limited knowledge in IT, crypto, and trading.
Previously, I worked as an architect in Singapore for over a decade before leaving my career to be with my child. The world of crypto presented an opportunity to fulfill my desire to spend more time with my family.
In April 2021, my husband discovered Hummingbot software, which enabled him to earn rewards by providing liquidity. This discovery reminded us of the early days when he mined ETH with graphic cards. However, I was unable to participate immediately as he was still perfecting his strategies.
The mid-year market crash of 2021 initially dampened our spirits, casting doubt on whether it was worthwhile to continue our investment in liquidity mining.